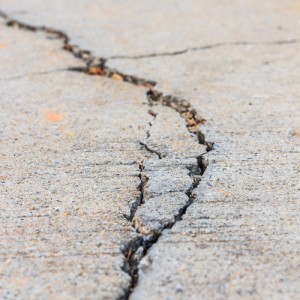
After pouring and finishing a perfect slab of concrete, it’s extremely frustrating to come back later to find unsightly cracks have ruined your work. We know concrete is going to crack. It’s one of the weaknesses of working with the material. Concrete shrinks at a rate of 1/8-inch per 20 feet. As it shrinks, the stress pulling it apart often exceeds the strength of the concrete, which leads to cracks. Knowing this, however, can help to plan for it and control it. This is done by adding joints to concrete surfaces in areas at risk for cracking. Here are a few of the most common forms of concrete joints.
- Isolation joints
These are also referred to as expansion joints. Isolation seems to be more fitting, however, considering they’re used in situations when your concrete surface and the floor need to be able to move independently. The isolation joints are added to create a separation between the two surfaces. Most commonly, you’ll find isolation joints made from asphalt-based, cork-like materials.
- Construction joints
These concrete joints are a little like bookmarks. If you’re working on a concrete slab and are interrupted for a long period of time, you’re probably going to come back to find cracks, or that a cold joint has appeared. A cold joint means that this batch of concrete is already set and won’t mix with additional concrete you need to add. Whether it’s an interruption, or you reach the end of the day, adding a construction joint in these situations, independent of other joint planning, is important.
- Control joints
These are likely the most recognizable type of concrete joint and are commonly seen in neighborhood sidewalks. The idea is to create a straight line of weakness in the concrete where cracks can occur without ruining the entire surface. To create a control, or contraction, joint, a groover tool, or jointer, is used. This will put a narrow groove in the slab. The rule of thumb is to create a groove of at least 1/4 of the slab’s thickness and joints should be spaced between 24 and 36 times the thickness of the slab.
- Saw joints
Similar to control joints, these joints are sawed in rather than added with a groover tool. Again, joints should be at least 1/4 of the thickness of the slab, but sawing should be done as soon as the slab is set enough to allow it. Waiting too long will allow cracks to form before the joints can be added, or cause cracks to form ahead of the saw. Starting too soon will cause tearing in the slab. On surfaces that are expected to carry heavy traffic, like warehouse floors, saw joints are typically favored over control joints.
Using these joints in your concrete surfaces can’t prevent cracks entirely, but they will be minimized and controlled.
For all the tools and materials needed for a successful concrete project, come see us at Maxwell Supply, or give us a call at 918-836-8606.
